How Windows Malware Removal Works: The Hidden Persistence Layer
Malware removal fails not because scanners miss files, but because the operating system actively restores deleted components through hidden persistence hooks.
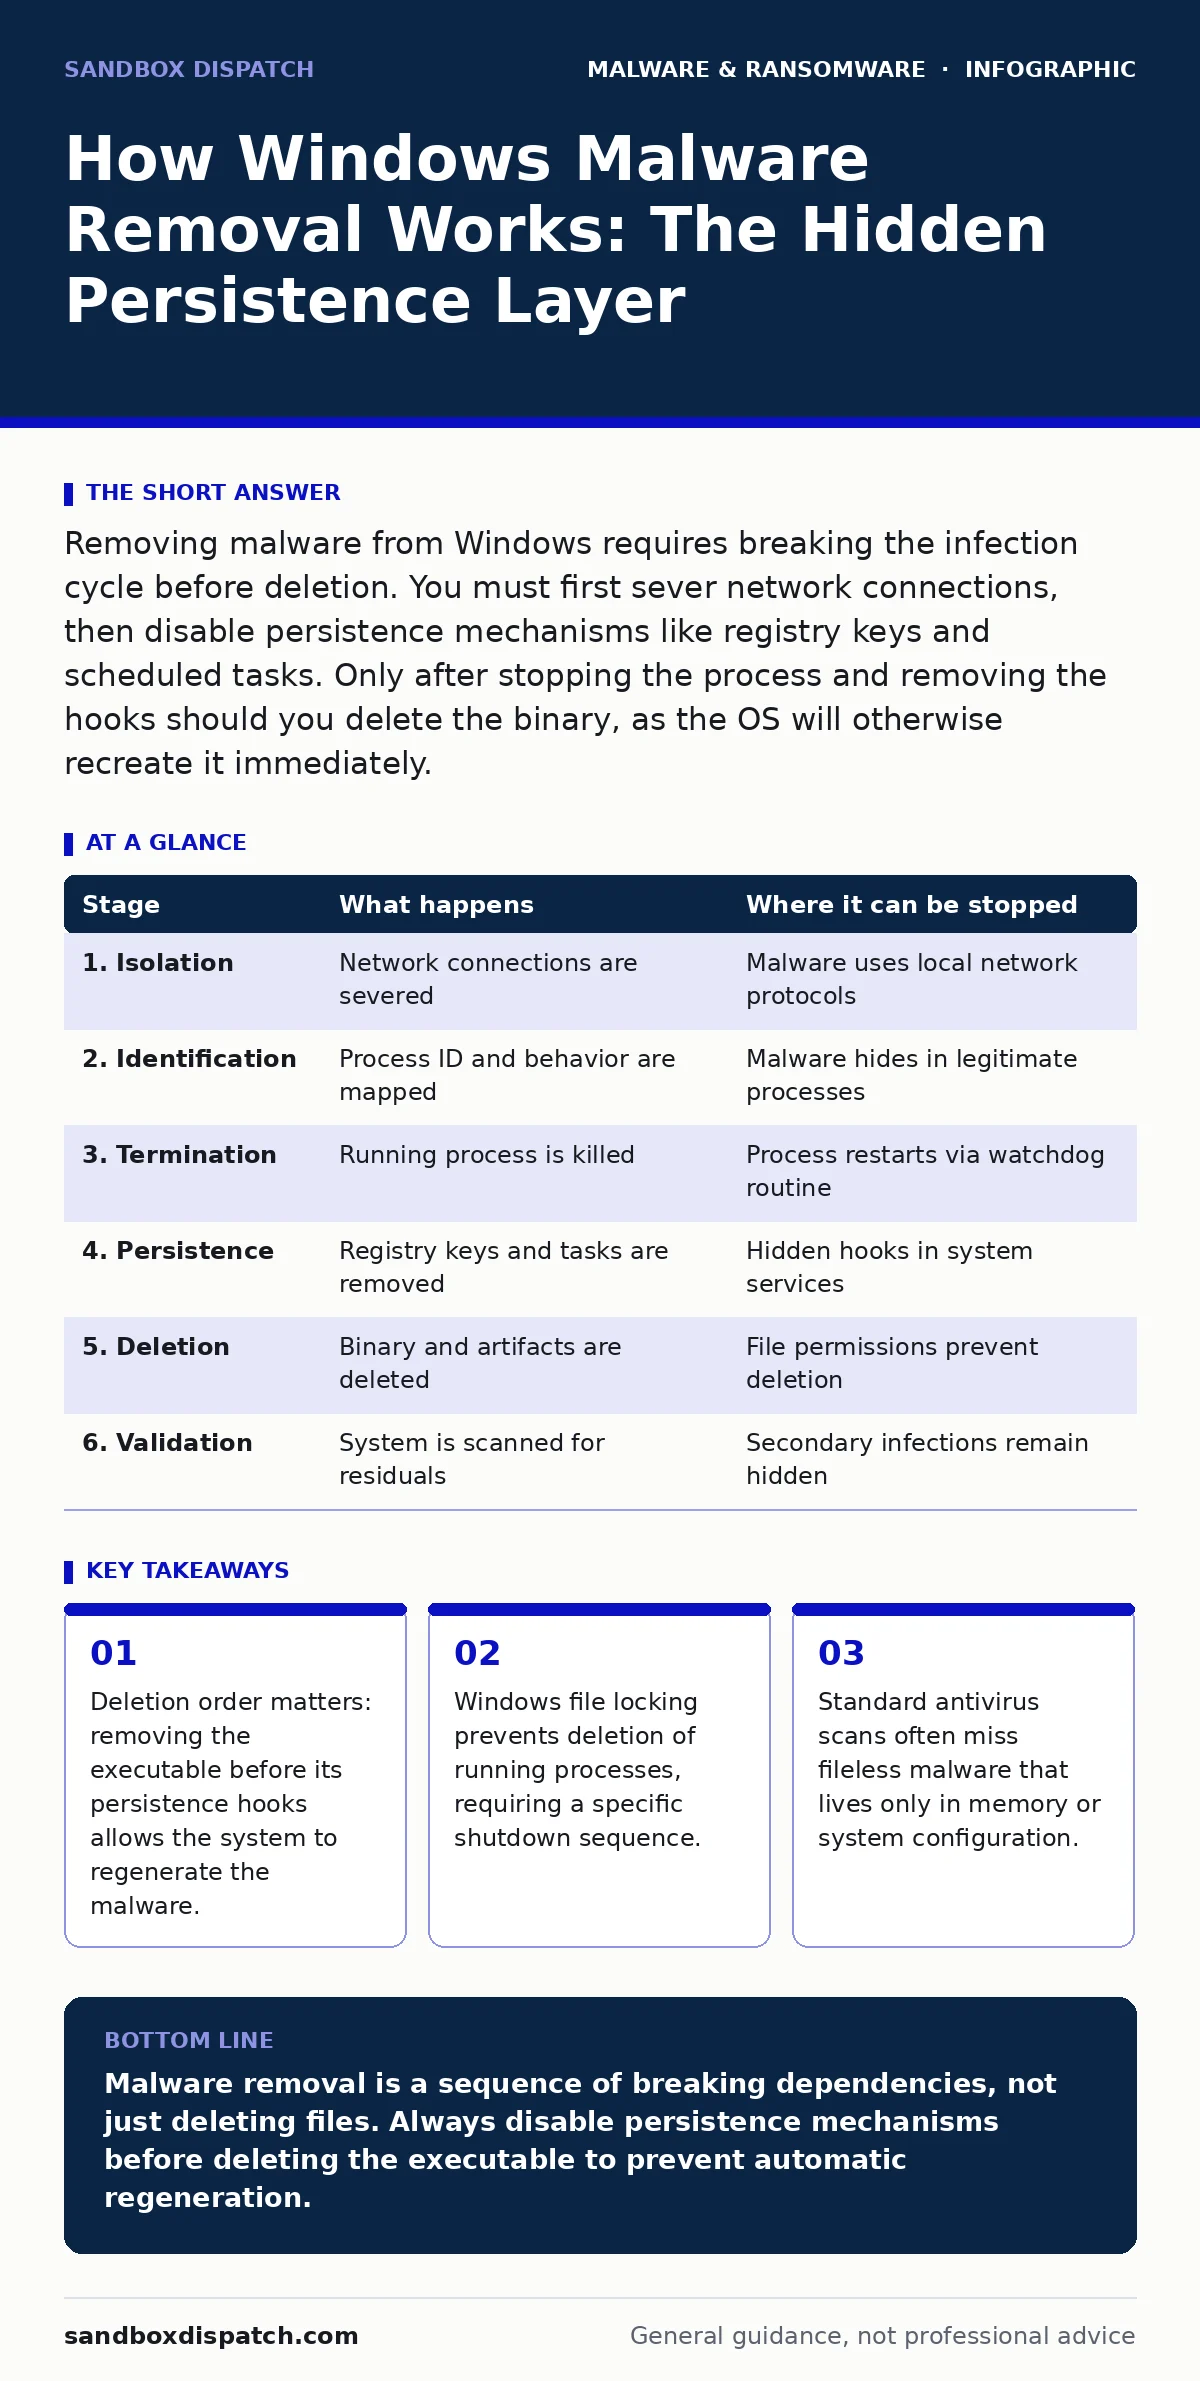
Removing malware from Windows requires breaking the infection cycle before deletion. You must first sever network connections, then disable persistence mechanisms like registry keys and scheduled tasks. Only after stopping the process and removing the hooks should you delete the binary, as the OS will otherwise recreate it immediately.
The Illusion of Simple Deletion
Imagine finding a malicious file and pressing delete. On a clean system, this removes the threat. On an infected Windows PC, this action often triggers a recovery routine. Malware authors anticipate your response. They do not rely on the executable file alone. Instead, they install multiple triggers that instruct the operating system to restore the deleted component.
This dynamic turns removal into a sequence of dependencies. You cannot simply remove the bad file. You must dismantle the structure that protects it. If you delete the core binary while the persistence mechanism remains active, the malware recreates itself within seconds. This loop continues until you address the root cause, not just the symptom.
Stage 1: Severing the Network Tether
The first step is isolation. Malware often communicates with command-and-control servers. These servers issue new instructions, download additional payloads, or exfiltrate data. If the malware remains connected, it can signal other infected machines or trigger defensive obfuscation.
Disconnecting the machine from the internet stops this two-way communication. It does not remove the malware. It simply freezes the external interaction. This creates a window of opportunity to inspect the system without the threat escalating. For remote systems, this step might involve disabling network adapters or physically unplugging the cable.
Stage 2: Identifying the Active Process
Before you can stop the malware, you must find it. Modern malware often hides in plain sight. It may use legitimate system processes to mask its activity. This technique, known as process injection, allows the malicious code to run inside the memory space of a trusted application like the browser or the system shell.
You need to identify the process ID associated with the malicious behavior. Task Manager provides a basic view, but it is often insufficient. The malware may hide from standard views. You must look for anomalies in CPU usage, memory consumption, or network connections that do not match the process name. This identification is critical because you cannot kill a process you cannot see.
Stage 3: Terminating the Running Instance
Once identified, the process must be terminated. In Windows, a running file is locked by the kernel. The operating system prevents deletion of files that are currently in use. If you attempt to delete the malware executable while it is running, the system will return an error.
Terminating the process releases this lock. It stops the malicious code from executing further instructions. However, this is a temporary measure. The process will restart if the persistence mechanism is still active. You must terminate the process quickly and move to the next stage. Do not linger. The malware may have watchdog routines that restart the process if it detects termination.
Stage 4: Dismantling Persistence Mechanisms
This is the most critical stage. Persistence refers to the methods malware uses to survive reboots and process termination. Without removing these hooks, deletion is pointless. The malware will simply restart. Common persistence methods include registry run keys, scheduled tasks, and service installations.
You must inspect these areas for unauthorized entries. Registry keys under Run or RunOnce execute programs at startup. Scheduled tasks can trigger the malware at specific intervals or system events. Services run in the background with high privileges. You must disable or delete these entries. Refer to our guide on malware persistence mechanisms for a deeper look at how these hooks operate. This step breaks the loop that recreates the malware.
Stage 5: Deleting the Binary and Artifacts
With the process killed and the persistence hooks removed, the file lock is gone. The malware executable can now be deleted. This is the physical removal of the threat. You should also look for associated artifacts. These might include configuration files, temporary downloads, or helper scripts.
Deleting the binary removes the primary threat. However, it does not remove the damage the malware caused. It does not restore encrypted files or remove backdoors created by other components. This step is purely about removing the malicious code from the disk. Ensure you delete the files from the recycle bin to prevent easy recovery.
Stage 6: Validating the Clean State
Removal is not complete until you verify the system is clean. This involves checking for residual processes, registry entries, or scheduled tasks. You should also look for signs of compromise in user profiles and system logs. A clean system should not have unknown processes consuming resources.
This stage often reveals secondary infections. Malware may have installed additional components that were not immediately obvious. You must repeat the previous stages for any new findings. Validation ensures that the removal was thorough. It prevents the recurrence of the threat.
| Stage | What happens | Where it can be stopped |
|---|---|---|
| 1. Isolation | Network connections are severed | Malware uses local network protocols |
| 2. Identification | Process ID and behavior are mapped | Malware hides in legitimate processes |
| 3. Termination | Running process is killed | Process restarts via watchdog routine |
| 4. Persistence | Registry keys and tasks are removed | Hidden hooks in system services |
| 5. Deletion | Binary and artifacts are deleted | File permissions prevent deletion |
| 6. Validation | System is scanned for residuals | Secondary infections remain hidden |
Limits of Manual Removal
Manual removal is effective for known threats. It struggles with fileless malware. This type of malware lives entirely in memory. It does not create files on the disk. Removing it requires a different approach. You must clear the memory or reboot the system.
Even then, fileless malware may have injected code into system processes. Rebooting does not always clear this if the injection persists in the boot sector. For such cases, consider script blocking to prevent the initial execution. Manual removal also lacks the context of behavioral analysis. You might miss subtle changes in system behavior.
The Role of Automated Tools
Automated tools can assist in removal. They use signature databases and behavioral heuristics. These tools can identify known malware variants. They can also detect suspicious behavior. However, they are not infallible. New malware variants may not be in the database.
Automated tools can also cause false positives. They may identify legitimate software as malicious. This can disrupt system functionality. You must verify the findings. Do not rely solely on automated tools. They are a supplement to manual removal, not a replacement. For advanced threats, consider extended detection and response (XDR) solutions that provide broader visibility.
Key takeaways
- Deletion order matters: removing the executable before its persistence hooks allows the system to regenerate the malware.
- Windows file locking prevents deletion of running processes, requiring a specific shutdown sequence.
- Standard antivirus scans often miss fileless malware that lives only in memory or system configuration.
Malware removal is a sequence of breaking dependencies, not just deleting files. Always disable persistence mechanisms before deleting the executable to prevent automatic regeneration.
Frequently asked questions
Can I remove malware by just deleting the file?
No. Most malware installs persistence hooks that recreate the file. You must disable these hooks first.
Does disconnecting the internet remove the malware?
No. It only stops communication with command-and-control servers. The malware remains on the disk.
Is manual removal better than antivirus?
Manual removal allows for precise control and understanding of the threat. Antivirus is faster but may miss novel or fileless threats.
What if the malware comes back after a reboot?
This indicates a persistence mechanism was missed. Check scheduled tasks, registry keys, and system services.
How this guide was produced: written by the Sandbox Dispatch editorial team with AI assistance, checked against the public references listed below, and reviewed when the facts change. See our editorial policy or report an error.